Build your own Battery Box
I decided to build my own battery box because the standard boxes on the market do not have what I want in a battery box.
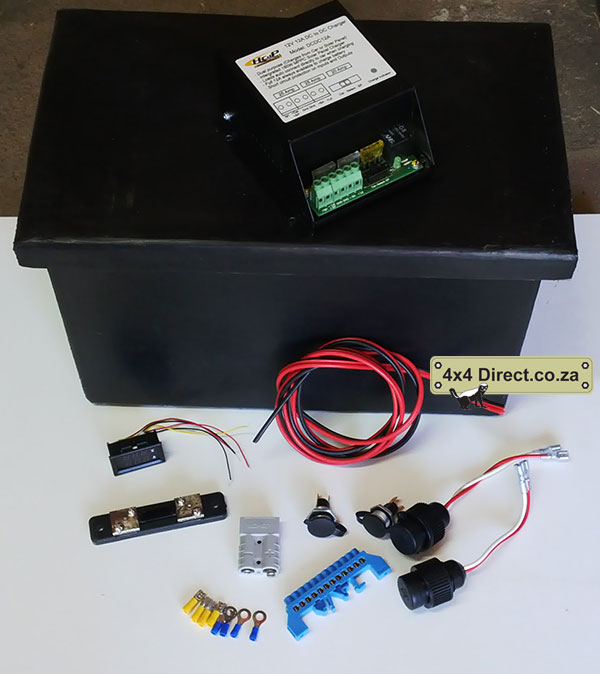
Obviously everything I needed I got from 4x4Direct.co.za
Because the battery is somewhat smaller than the box, I had to prevent the battery from moving around and damaging the wiring. I used a simple solution, I just dropped wooden blocks to the bottom of the battery box floor to take up the gaps. I’ve cut the planks the right size and then removed the battery again so I can work on the box.

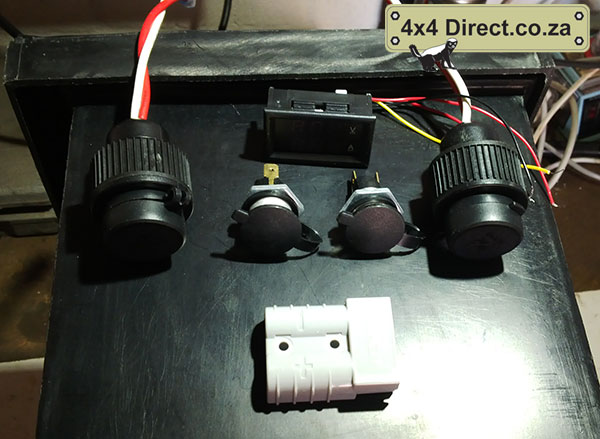
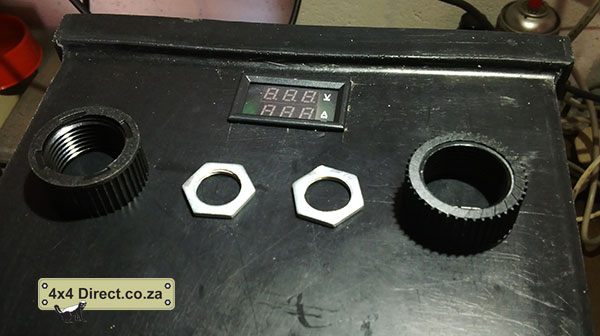
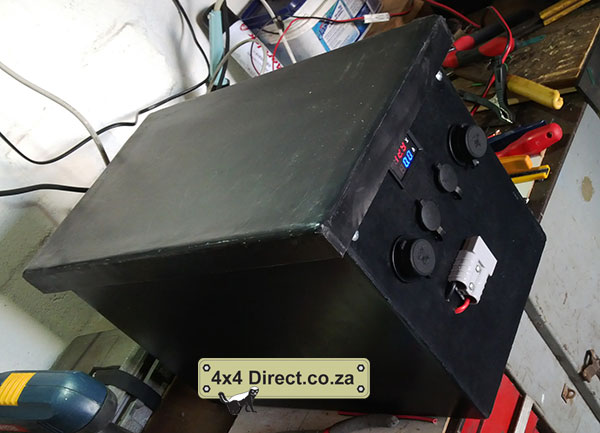
Then I packed the plugs and Volt meter on the box to decided where I will put what
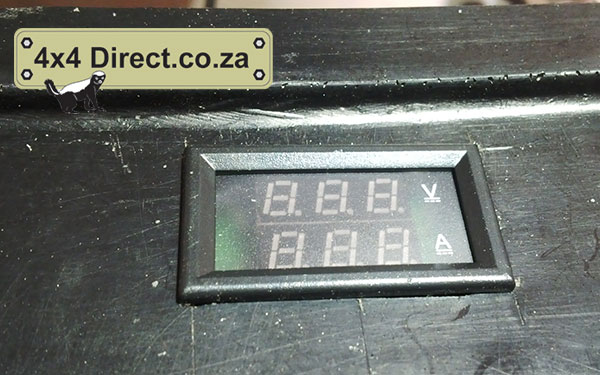
Then I measured the position of the Volt/Amp meter. The hole should be 45.5 x 26.5mm according to the specs. In Layman’s terms that is 45 x 26mm. I positioned it about 10mm from the top of the box so that the cover do not cover the meter. I then drilled holes on the side of my marked block, big enough for the jigsaw’s blade to fit in and cut out with jigsaw.
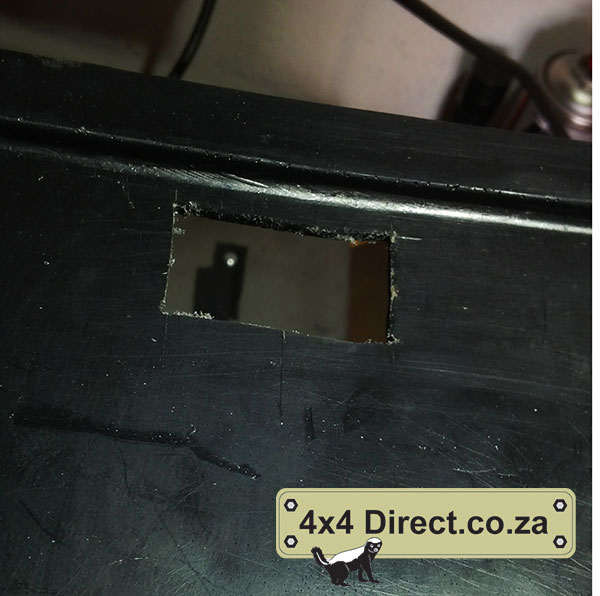
Then install the meter. WARNING: It fits so good, once it is in it is very difficult to get it out again. So maybe first drill the big holes and fit everything at the same time. I as too eager to see what it look like. Nothing bad happened but you might damage your volt meter while drilling the big holes for the power sockets.
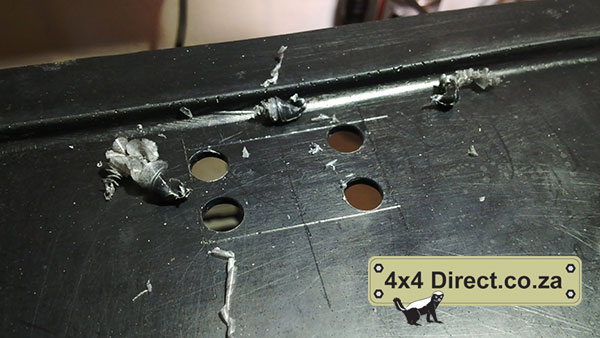
Then I packed the nuts for the sockets on the box to see how I am gonna space them.
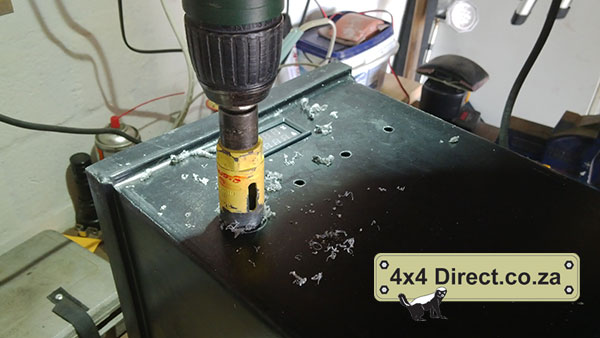
Then drill the holes for the power sockets. I went for 2x cigarette lighter sockets and 2x heavy duty (hella type) sockets, plus one Brad Harrison.
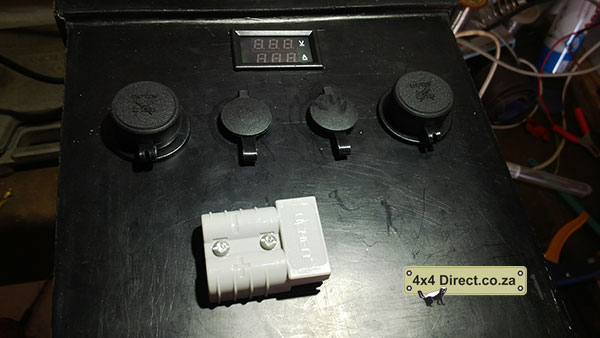
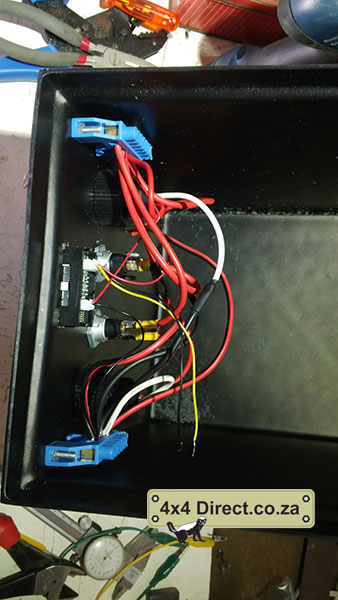
Install the sockets
Now for the inside.
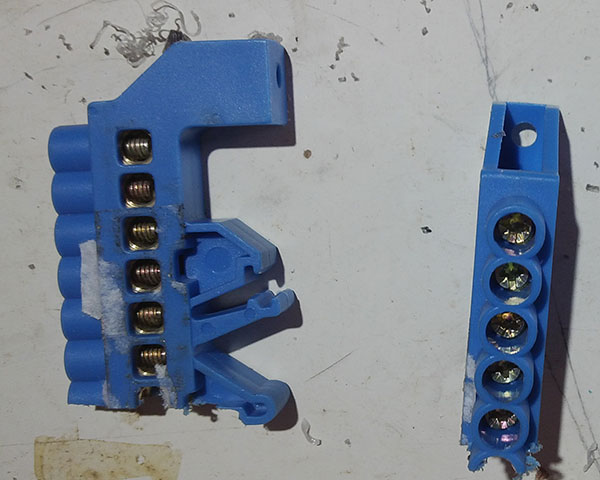
I bought a nifty buzz bar type of thing from Brights (the only thing 4x4Direct did not stock). They use this inside circuit breaker boxes. All the holes are connected to each other.
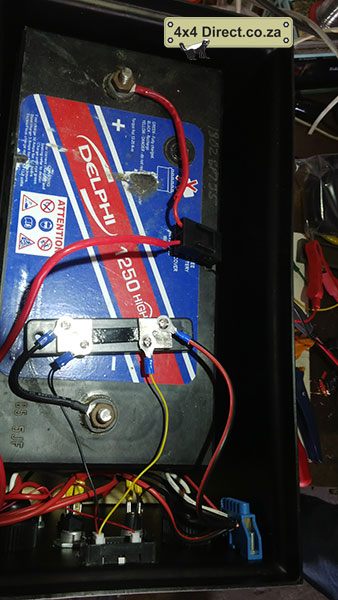
We cut it in half and use one half for all the negative wires and the other for all the positive wires. So I connected all the sockets and brad Harrison plugs’ wires to these blocks and then added one cable from each buzz bar to the different poles (+ and -) of the battery. I used 4mm wire for all of this. Note that I added a 20A fuse between the + pole and the wire going to the buzz bar.
Then I added the shunt for the amp meter. I sommer stuck it to the battery with double sided tape so it does not move around.
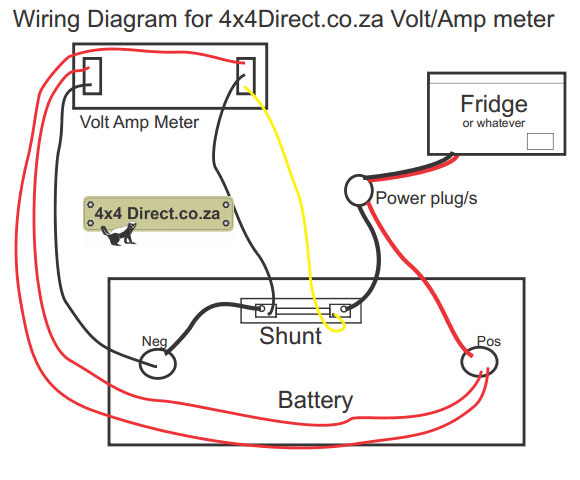
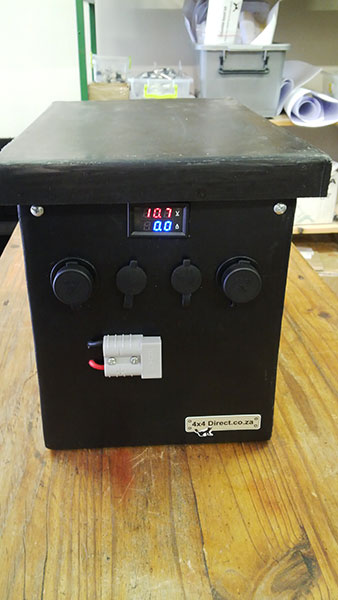
And viola , we had a battery box, complete with a Volt and Amp meter.
Next up in the next episode is the addition of a DC to DC charger and the input cable.
Watch this space.
4x4Direct South Africa