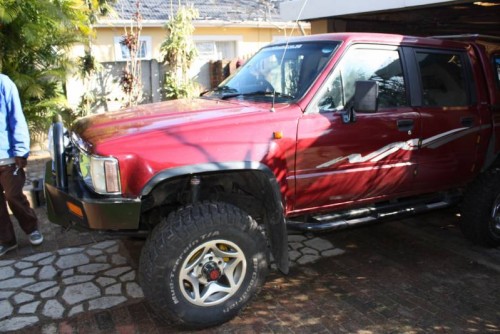
As mentioned, Tony (FIRSTGEER) commented as to why I had no snorkel fitted. Truth was that they were just recently available for the SFA from Pieter and I hadn't seen my way clear to tackling the task. Putting a drill and hole saw to body panels is also not something that one undertakes lightly and I had re-hashed my plan of action a few times over in my mind, checking measurements against the template and the template against the body. Anyway, yesterday seemed as good a time as any, and we had a little “free time” on our hands here and there during the course of the day.
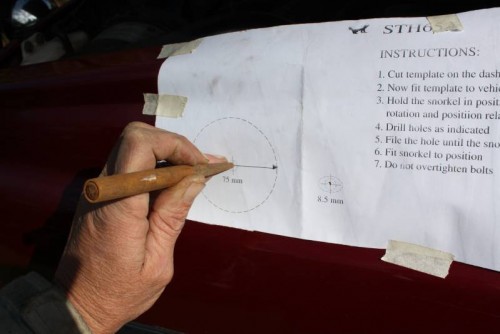
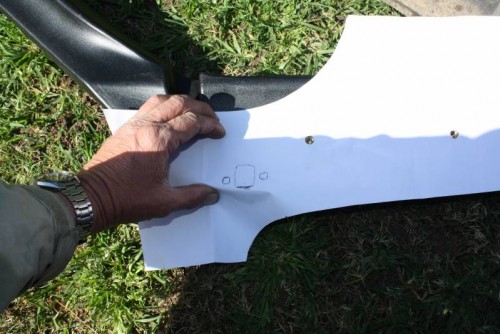
I found the template to be spot on against the snorkel, but my calculations put it a little too low by about 8mm. The side indicator on my model was in the way of the snorkel and had to be moved, but by lifting the snorkel by 8mm would just expose the old holes for the indicator. Also by lifting it higher, the riser tube would move further away from the A-pillar but of course one could compensate be moving the snorkel position backwards a little. The upshot was that I decided to keep it tight against the A-pillar and that I would shift the position by only 5mm up and 5mm back. (equal distances since the A-pillar rises at very close to 45°).
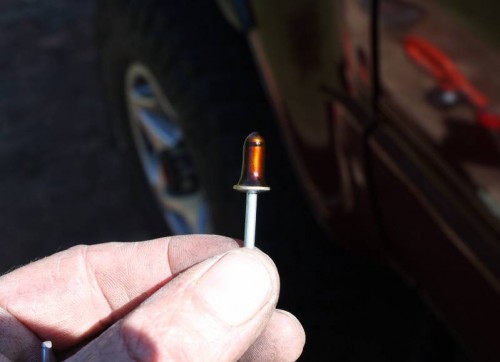
To start, I first removed the inner fender liner and the side indicator lamp and took an “impression” of the holes for the lamp so that I could accurately re-position it later.
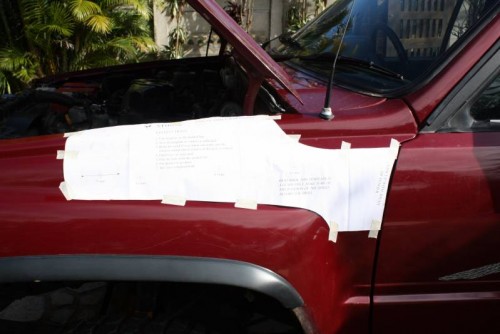
Then I taped the template to the body making sure that it lay flat and followed the curves of the fender. (5mm up and 5mm back)
The 'point on no return' …. centre popping the hole positions. (Excuse the rusty punch

… my tools don't look like that … the canopy on the work bakkie leaked and water got into my punch and chisel box.

)
I had marked the position of the existing indicator holes on the template and checked it against the snorkel to ensure that it would be covered. (Geez those are wrinkled hands!

)
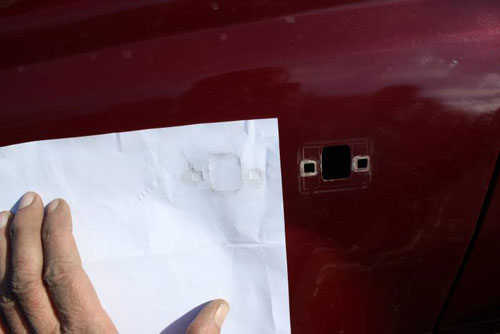
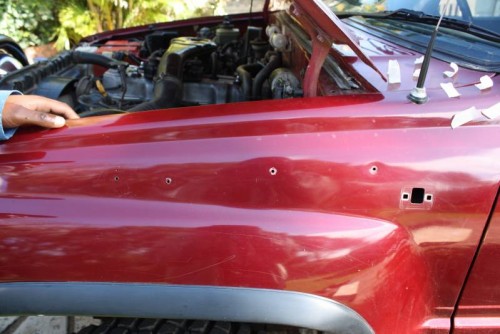
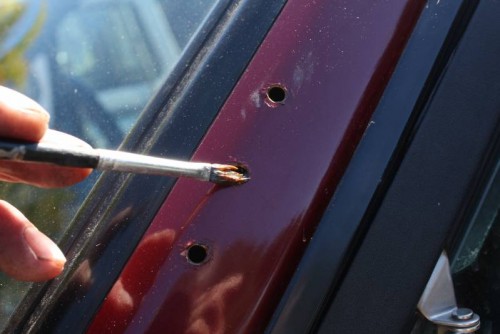
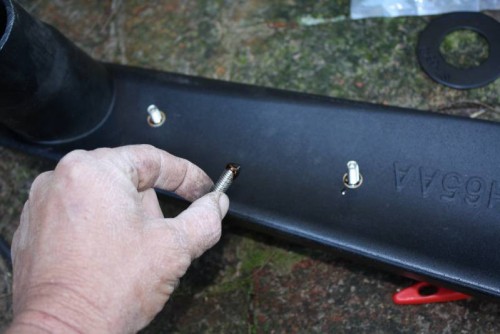
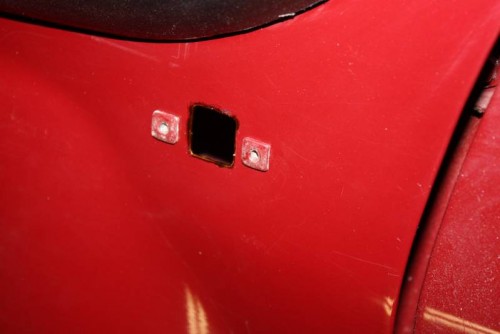
Perhaps I centre-popped the fender hole positions a little too hard as it left small dents, however I wasn't concerned about that since the flange washers and bolts would pull them straight or even outwards when tightening the snorkel. Behind the snorkel anyway. I was also going the use the masking tape over the positions before drilling, but didn't bother because I was going to treat and seal all bare metal before fitting the snorkel. (And time was against me). First 4mm pilot holes …..
… and then 8mm holes for the studs. The template instructions say 8.5mm but the studs are 8mm and I had checked that the positions were spot on. I wanted as little free play as possible (I could always enlarge them if necessary, but 8mm worked fine).
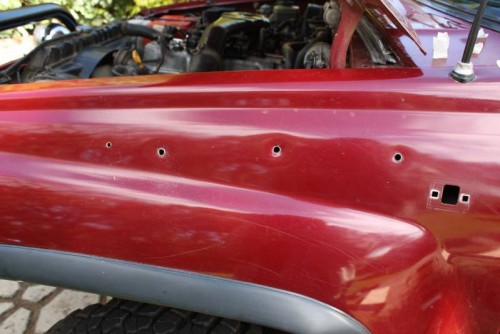
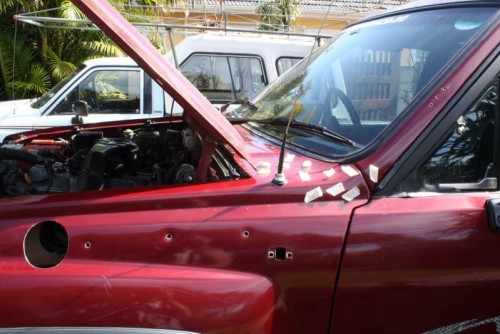
The template says a 75mm hole for the snorkel through the fender, but a considerably larger hole is required, about 80mm would be closer to the truth. This isn't a problem because it allows you to file away where you need to in order to get the snorkel fitting nicely .... I had a 76mm hole saw and decided to use a power-file (the one and only Black & Dekker tool that I own

…. would have bought Bosch if they made one at the time). Nonetheless it made life easy.
Holes drilled and starting to file the outside.
Once the snorkel body lay flat against the fender, I marked and drilled the holes for the pillar bracket.
Satisfied with all the holes, I treated them all with two coats of rust converter … even though there is no rust it acts as an inhibitor and etch-primer because of the phosphoric acid content.
While waiting for coats to dry I cut out the impression I took earlier and looked at new hole positions.
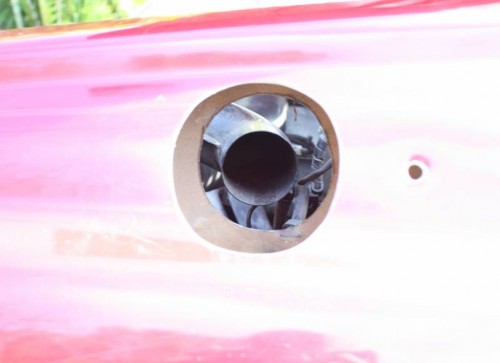
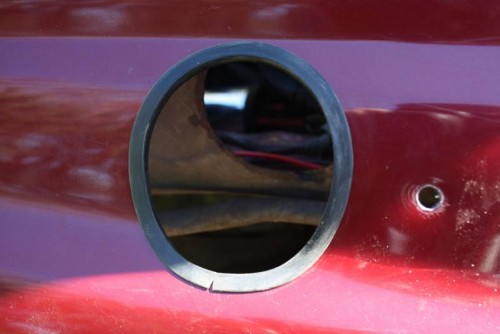
I sealed over all the treated metal edges with Tectyl rather than use silicone which is often hygroscopic and attracts moisture. I fitted a silicon rubber edge trim around the inner and outer snorkel holes. The pic just shows the outer one done (joint to the bottom so that it doesn't hold any water).
Painting Tectyl into the holes.
I also dipped the rivets into the Tectyl to make sure that they would seal.
The studs looked like they were electro-galvanised, so to protect them from rust and the brass inserts from corrosion, I dipped the ends into Tectyl before turning them in and painted them with Tectyl before fitting. (Correction .... those are DIRTY wrinkled hands!

)
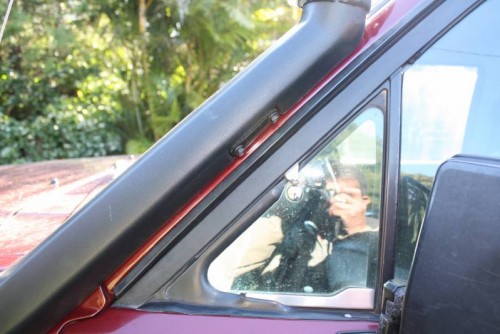
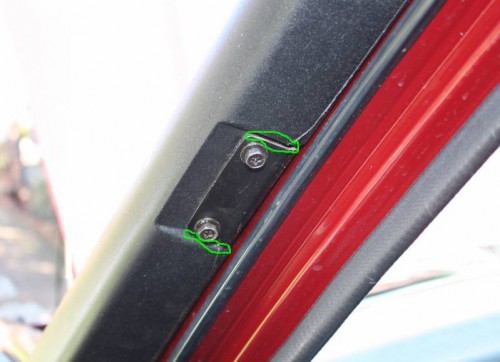
I had to drill out the rivets and remove the pillar bracket because when riveted fast it stood at a different angle than the seat on the snorkel due to the curvature of the pillar. Not only did it have a gap on the inside edge but it was impossible to fit the snorkel without first removing the studs since it wouldn't allow the holes to line up. Also, the bracket was a little big for the recess on the snorkel, so I ground off the edges a little to fit snugly and bent the bracket open by about 10° (100° instead of 90°). The bending process also put a bit of a curve into the side that rests on the pillar which was OK since the pillar is not flat anyway. Now it goes on and comes off with ease, but no free play.
The edges that I ground back a little.
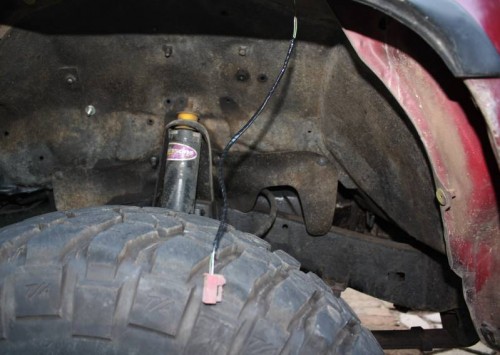
Snorkel; fitted, very sturdy, no movement. (So far I have not experienced any strange sounds or wind noise, but have only done up to 90kmph on an express-way. Will see what happens on the open road.)
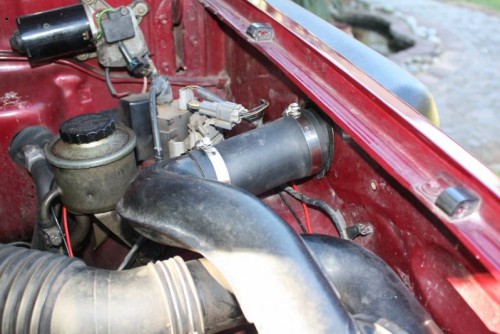
The internal connection. I used the hose section in it's full length, rather than cut it down I just forced it further onto the pipes on both sides.
I had to leave it all there and come back to complete the job later. Up to this point took me about 2½ hours!

However, it was a learning curve while double checking everything.

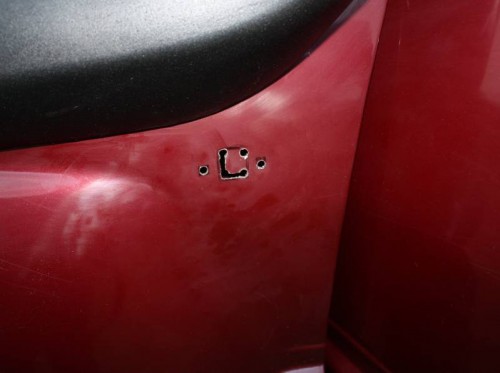
When I got back to it in the evening, I first had to extend the wires on the indicator since they were too short and were already a bit tight in the original position. I staggered the joints which I soldered, and insulated them far to either side with tape so as to inhibit moisture ingress.
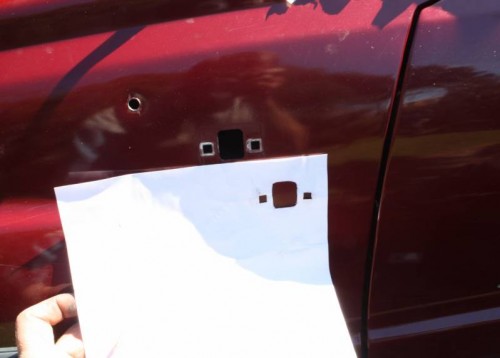
Then I levelled and marked the new hole position with the 'template' I had made from the impression of the original hole.
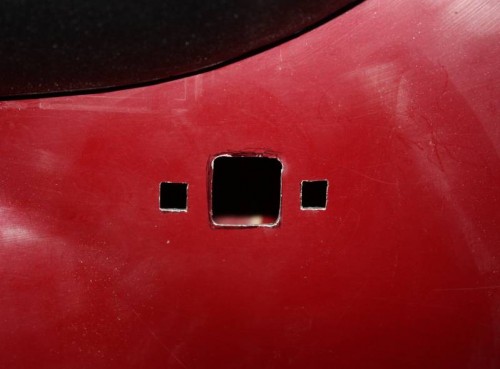
Instead of using a jig-saw which would scratch the paintwork without a protective foot and tend to deform the edges of the thin metal, I decided to cut them out by hand with a needle file.
The holes cut.
The bare edges treated and sealed like the others before and the screw inserts in place
This pic shows the inner profile of the snorkel against the body. It's held away from the panel a bit by the silicon rubber edging I had fitted around the hole, but one can see that it follows the body profile quite closely. Perhaps another millimetre or two higher would have been perfect, but as it was, I was already close to exposing the original indicator holes ….. so I'm happy with it.
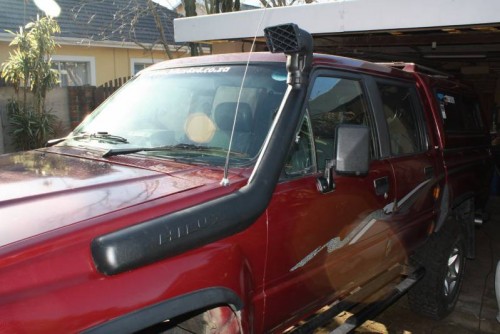
All done!