Build your own aluminium canopy
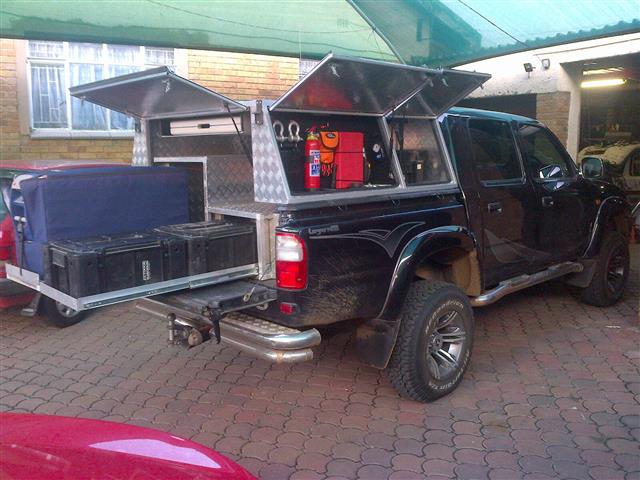
Since I sold my off-road trailer I needed to get an Aluminium Canopy for my Hilux.
(NOTE: This article was written in 2008)
At the time of writing just a basic empty Aluminium canopy would set me back about R14,000. I calculated the cost and realized that I can save a lot by doing it myself. It was still quit expensive to do it myself. If you include the time you spend into your calculations it is probably worth buying one. But since building things is my way of relaxing I do not include the time I send into my calculations.
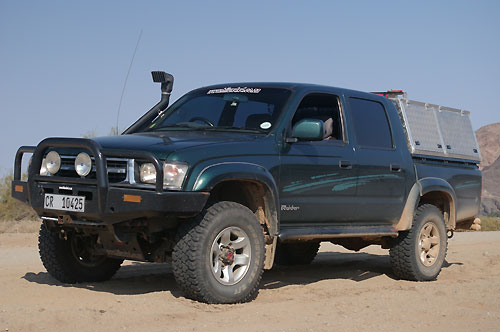
At the same a friend and fellow Hilux forum member, Niel, decided to build a canopy for himself for his upcoming Richtersveld trip.
So Niel and myself set out to build our own Aluminium canopies.
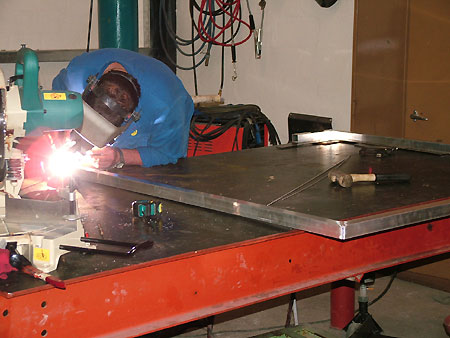
Because I cannot weld aluminium we had to get somebody to do the welding for us. We had some ridiculous quotes like R6,000 for the welding only. Finally we had an arrangement with two gentlemen from Langebaan that we will do the cutting and fitting and they will do the welding for us.
We decided to use 38x38x3mm square tubing for the frame. We decided on this purely for strength. Niel will be adding a roof top tent to his canopy soon and he is a big guy and myself will be standing on my canopy when taking photographs. That is why 38x38x3 seemed like a good strong option.
I doubt that there will be a great weight difference between using steel sqr tubing with a 1.6mm wall thickness compared to alu with 3mm wall thickness. Steel you can weld yourself, but if you stay down here by the coast you will have to have it galvanized.
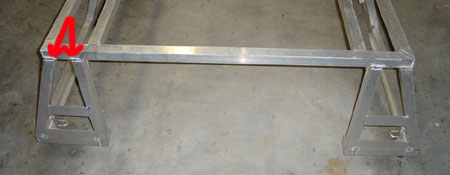
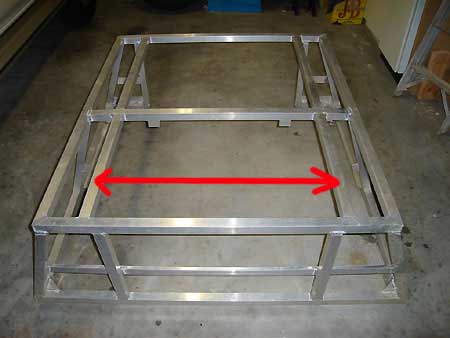
First we welded the bottom frame, the size of the load bin. We both have 1998-onwards Hiluxes. Niel a 2004 KZ-TE and myself a 1999 2700i Hilux. The load bins are the same size so we could build both canopies at the same size.
The size of the base frame is: 1,410mm long and 1,530mm wide
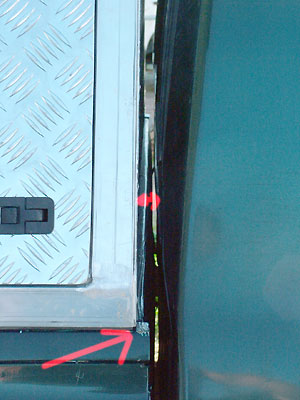
This is where we made our fist little mistake. We built the base frame the same size as the load bin. Only after everything was finished we realized that it should be slightly smaller. The reason for this is that if it is the same size there will be very little space between the canopy and the cab at the front. If you install a window, the window rubbers will touch each other. In the picture below you will see that we moved it backwards about 10mm in order to increase the gap.
Thus on the first canopy we had to cut the frame, remove 10mm and re-weld it again. The measurements I gave above is the correct size. It will be best to always measure your own vehicle as the measurements might vary slightly between vehicles.
Next up we had to weld the upright legs. You will note that I decided to make the canopy slightly lower than the cab. The reason for this is to minimize wind resistance.
If you make the canopy high enough to take two ammo cases on top of each other, it will stick out too much above the cab and wind resistance will be high. So I decided to make it slightly lower than the cab. The only downside will be that I can fit only one row of ammo cases on the slide at the front doors.
I have seen some canopies with only one door on each side. I decided to go for two doors on each side. Firstly it added another pillar in the middle which makes it stronger and secondly you do not always need everything inside the canopy. Sometimes you only need the kitchen and do not have to let the rest be open to the elements.
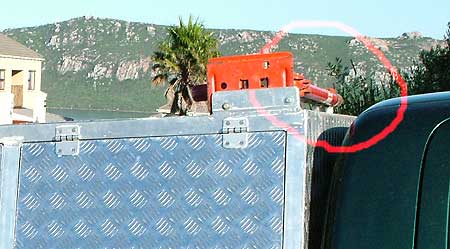
The picture below shows that the canopy is slightly lower than the cab.
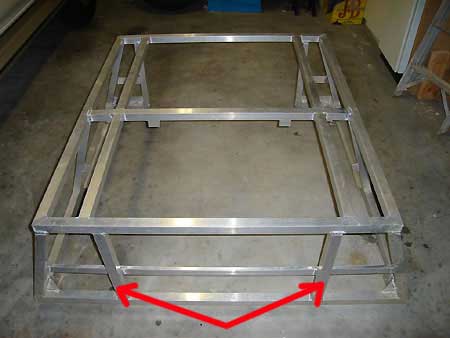
On our canopies the upright legs were cut 465mm long with a 20 degree angle. 20 Degrees is more or less the same as the angle of the cab.
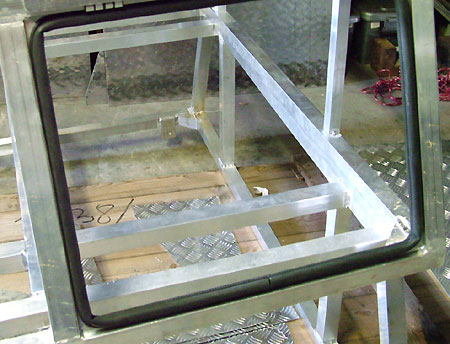
We first installed the base frame to the vehicle and then welded the upright legs onto it. We only welded it slightly in order to be able to move it afterwards. We then determined the size of the upper frame.
PLEASE NOTE: The longer your upright legs the narrower your upper frame will be.
In our case the upper frame is 1,210mm wide and 1,410mm long
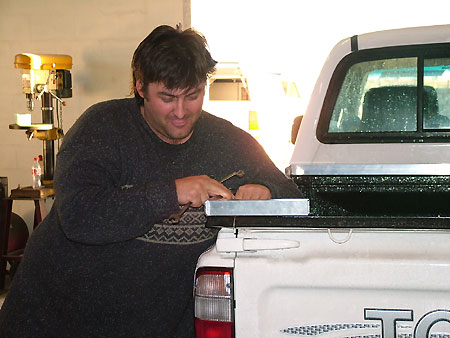
Niel fitting the base frame to the vehicle

Adding the upper frame to the legs
Because the canopy is not high enough to take two ammo cases on top of each other I decided to make the front door slightly larger so that the ammo case can slide in side ways. This way I will be ale to use three ammo cases behind the cab. If you slide the ammo cases in over their length you will only be able to fit two of them.
The distance between the legs at the front side doors is 575mm and at the rear side doors it is 720mm.
The size of the back door is different on the two canopies. I wanted my door as large as possible without being sloped. Niel on the other hand wants to add his gas cylinder to the back, next to the door. In order to do that you need a larger rear side panel, thus a smaller door. My canopy’s rear door os 990mm wide. The only difference between the two is that I moved the upright supports at my rear door as close as possible as the side upright supports. The picture below shows the back side of Niel’s canopy. Note the gap between the rear and side supports.
In front we also welded two upright supports. The distance between these supports are just as wide as the width of the rear window of the vehicle. Niel will be fitting front and rear windows. I will not be fitting windows at this stage, but welded the supports in the same position in case I change my mind later on.
At the top we welded one support over the width of the canopy above the middle side leg. We then welded supports on both sides over the length of the canopy. These supports are the correct distance apart to be able to fit a roof top tent. The centres of these supports are about 870mm appart.
Below are the main dimensions mentioned so far. Please note that these dimensions are only an indication and will differ on each different type of vehicle.

Now that the frame is complete we have to start with the doors.
I decided to fit the door frames and doors before I fitted the roof cladding. The reason was simple; it gives you much more space to work.
I also decided not to make frames for the doors itself. I just use a 3mm thick aluminium checkered plate with no frame. It does distort a little bit over the long edges and I might add a piece of tubing on the inside to strengthen it later on.
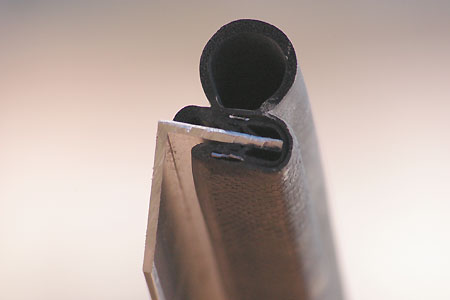
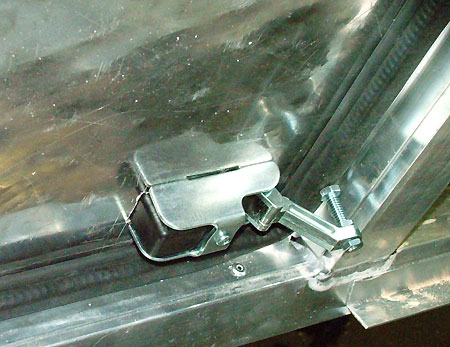
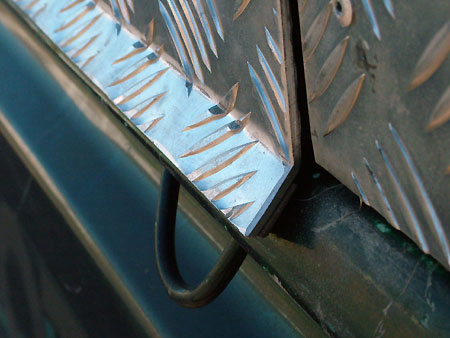
For door rubbers we opted for the type they use in cars. They look like a hollow tube. See photo below. These rubbers are very effective and easy to use.
Get them here, click
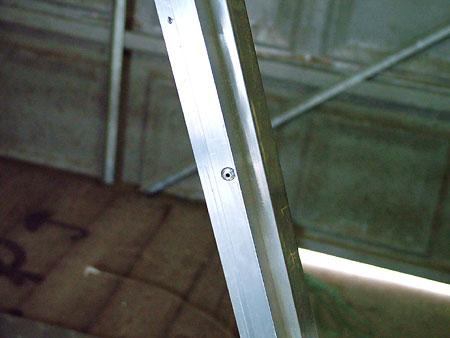
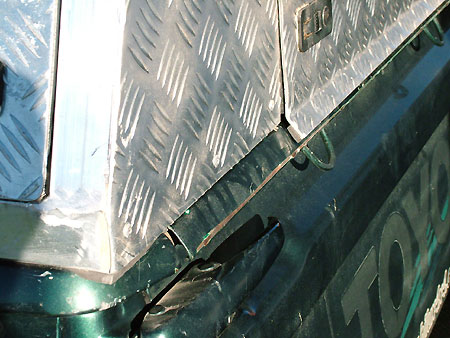
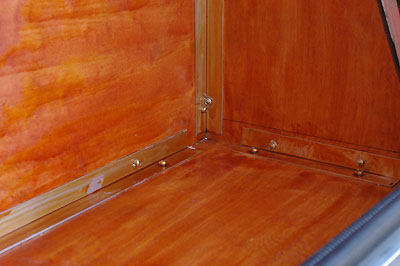
To attach the rubber to the frame I used a 20x20x1.6mm angle aluminium. Because the strip is so thin I decided to pop-rivet it to the frame. I did add some “Sikaflex – 221” to the back of the strip before I attached it with the pop rivets. Sikaflex is a type of silicon but it is much stronger. It not only seals the frame but also ads to the strength. Apparently normal silicon will corrode the Aluminium and Sikaflex was developed especially for Aluminium. I also used Sikaflex to attach the roof cladding.
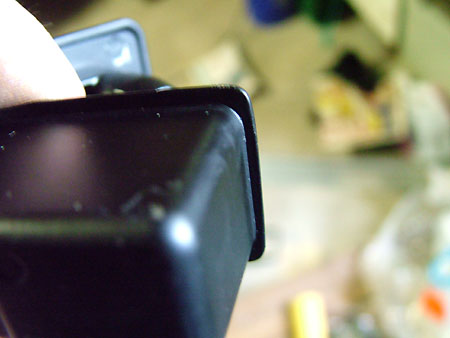
Because the uprights were welded in the corners the corners could not be cut perfectly. These little gaps in the corner were all closed with Sikaflex afterwards. See the next two photos
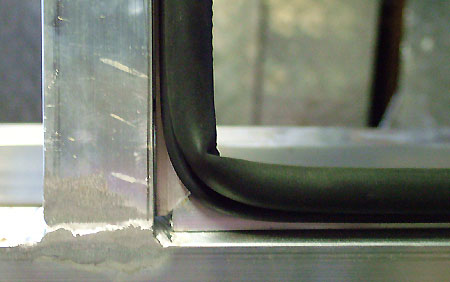
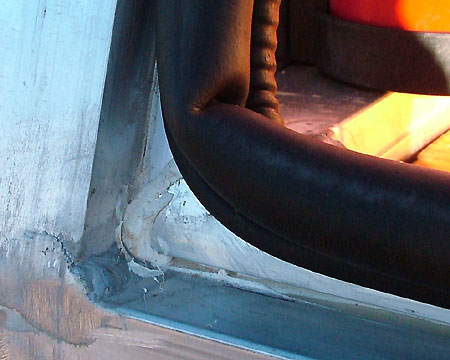
You can see that the door rubber slides neatly over the 20×20 angle.
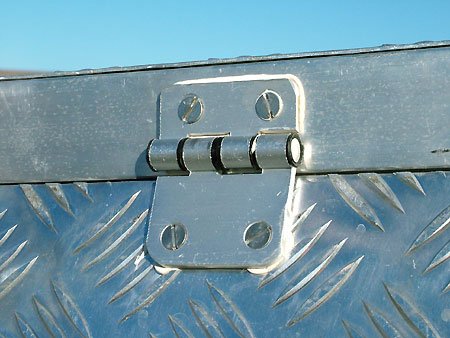
When fitting the doors I found that the hinges’ one side was a bit to long. So I had to cut them shorter and drill new holes.
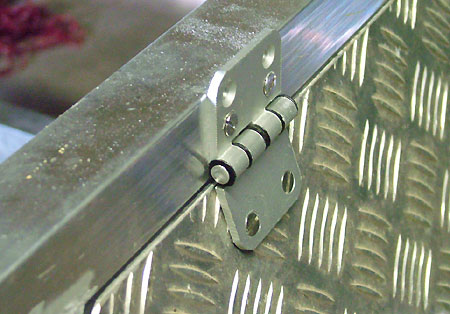
I used 5mm Stainless steel screws with lock nuts to attach the doors.
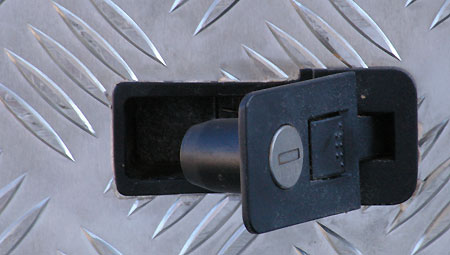
Locks
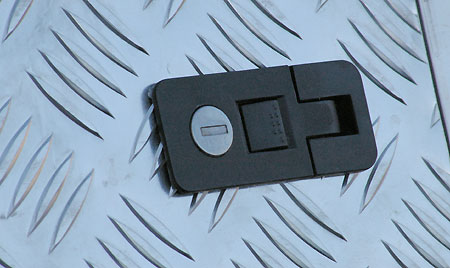
We bought these nifty locks. You can get them at 4x4Direct.co.za, called “Pressure Lever Lock”. On the outside the lock closes without anything sticking out and on the inside it pulls the door onto the rubber. It is also adjustable and you can order all locks with the same keys.
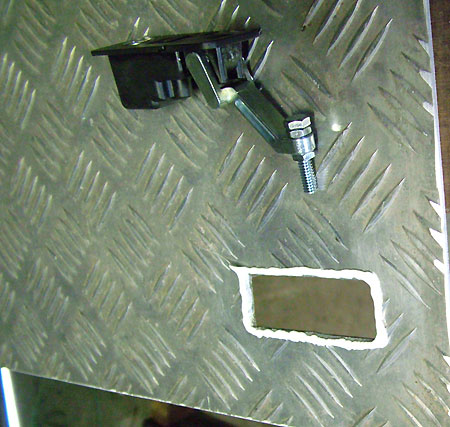
In order to fit the locks you need to cut a square hole in the cladding. I added some Sikaflex to the hole before I finally installed the lock. The lock comes with a rubber sea but the patterns on the checkered plate cause the seal to deform and the lock then does not close properly. That is why I removed the seal and use Sikaflex instead.
The should of the lock is very small so you must cut the hole exactly the same size as the lock.
Below are picture of the lock in the closed and open positions:
The back door
I had the sheet for the back door cut 20mm larger than the opening. I then measured the angle of the side of the loading bin. I took it to a company with a bending machine and asked them to bend the lower end to the same degree. This lip helps with sealing the door on the tail gate of the loading bin. It also prevent somebody from opening the tail gate if the canopy is locked.
 |
As I already mentioned I used 3mm Aluminium checkered plate for the doors. You can use thinner, lighter and cheaper plate, but then you will have to build a frame for each door. Although the doors do distort a little bit in the middle, the distortion is not enough to cause a leak. I will add some supports on the inside in the near future. I think using a thicker plate saves a lot of time and space as you do not need another frame.
|
For the boxes at the back I used 9mm ply wood. I bought half a sheet. That was just enough to manufacture the two boxes at the back.
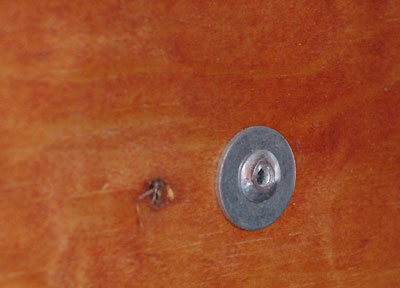
I used the same 20x20x1.6 aluminium angles to secure the wood panels to each other. I used pop-rivets to attach the wood to the aluminium strip. I also added an extra washer on the wood side of the pop rivet in order to prevent the head of the pop rivet pulling through the wood. See pictures below:
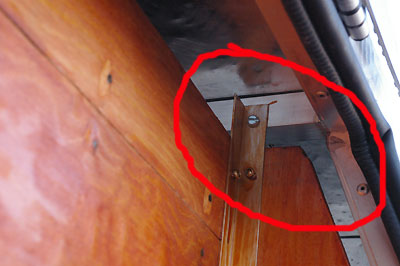
To secure the box to the canopy frame I added a 20x20x1.6 aluminium angle to the bottom and back of the frame. So these supports will remain on the frame, i can then remove the box if I want to.
At the front the angle iron securing the box is extended to the high of the roof so that it can bolt onto the support in the roof.
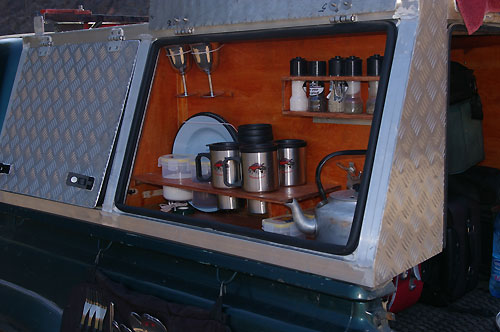
The kitchen takes very long and I guess the outlay of this will be unique to each person’s taste. I actually enjoyed building the kitchen the most.
It performed very well on its first trip to Namibia in June 2008. The only place where a little bit of dust came in was where the tail gate and canopy door comes together. I will still work on some plans to add some more rubbers to it.
Below is a more or less break down of the costs (2008):
15m Door Rubbers – R342.00
2 x Sikaflex tubes – R160.00
10x Locks – R1,057.00
10x Hinges – R264.48
5x Gas shocks with fittings – R421.80
Aluminium tubing – R2312.17
Aluminium checkered plate – R2,000.00
Cutting and bending – R300.00
Aluminium Welding – R2500.00
Nuts, bolts, pop rivets, etc – R200.00
Total cost – R9557.45 ( in 2008)
You can buy the locks, hinges, door rubbers, shock mounts and sikaflex online at 4x4direct.co.za
You can buy most of the hardware to build your own canopy from 4×4 Direct. Here are links to specific products we used:
Locks
Hinges
Sikaflex
Shocks (Gas Struts)
Rubber seals
Aluminium Tubing and flatbar – Almex in Blackheath (021)905-5770
Aluminium checkered plate and cutting – Non-ferrous Metal Works in Soutrivier -(021) 5110286
4x4Direct South Africa